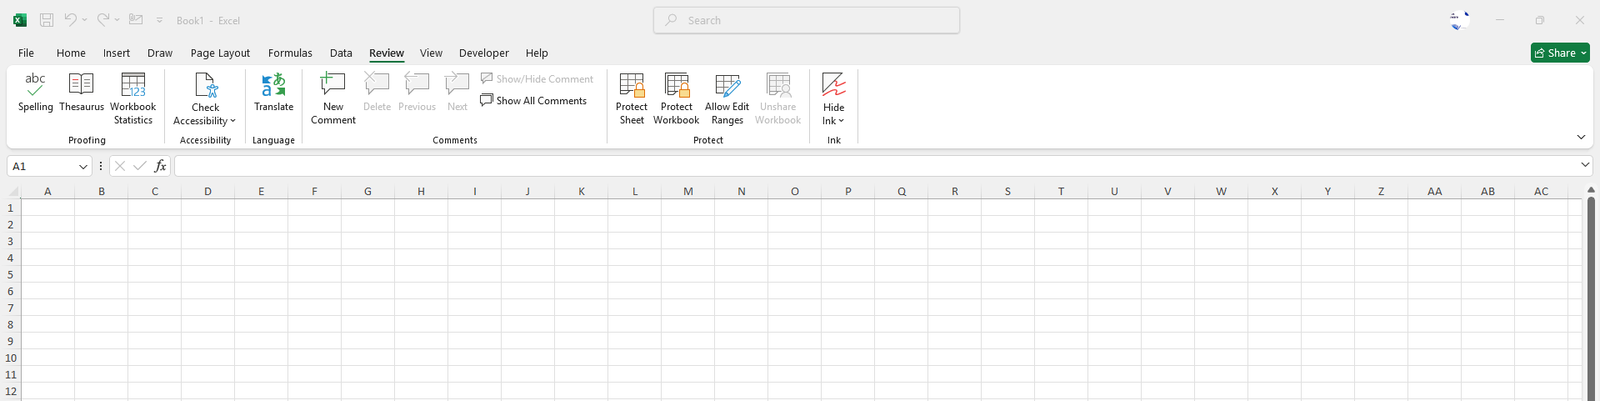
View Tab

The View Tab offers you a variety of options that help you control the way you want your workspace to be displayed within the workbook based on your requirements to increase and improve your productivity.

View Menu in Excel

Workbook Views

Provides you with different ways to display/view your worksheet based on your specific tasks.

  • Normal (Alt, W, L): This is the default view when you open a new workbook which is ideal for general editing and data entry.
  • Page Break Preview (Alt, W, I): This option creates a page break based on the print size and orientation marking dashed lines across the region.
  • Page Layout (Alt, W, P): Similar to Page Break Preview, it shows how your worksheet will look when it is printed including margins, headers and footers.
  • Custom Views (Alt, W, C): It lets you create custom view settings with options such as zoom level, hidden rows/columns and much more so you can easily switch between different views.

Show

Control the visibility of various elements in your worksheet with this command.

  • Ruler (Alt, W, R): Show or Hide the rules within your worksheet which will help you align objects on the page during printing.
  • Gridlines (Alt, W, V, G): Switch the visibility of gridlines in your worksheet which helps to visually distinguish data.
  • Formula Bar (Alt, W, V, F): Switch the visibility of the formula bar, but recommended to keep it checked when you are working with larger formulas as it helps you edit formulas easily.
  • Headings (Alt, W, V, H): Toggle the visibility of the headers of rows and columns in your worksheet.

Zoom

Allows you to adjust the zoom level of the worksheet for easier viewing.

  • Zoom (Alt, W, Q): Opens a dialog box that has the option to increase or decrease the magnification of the worksheet.
  • 100% (Alt, W, J): Go back to the default zoom level of your worksheet which is 100%.
  • Zoom to Selection (Alt, W, G): An interesting option in Excel that will zoom the level to fit the selected cell(s) within your current window.

Window

Manage how you want your workbook windows to be arranged as per your requirements.

  • New Window (Alt, W, N): Opens the current workbook in a new window. However, it is synced with each other where you can view different parts of the same workbook simultaneously and also edit. This is very helpful if you want to see two or three pieces of a live dataset together.
  • Arrange All (Alt, W, A): Arrange all the opened Excel windows side by side or within a grid that makes it easier to compare data across workbooks.
  • Freeze Panes (Alt, W, F, F): Very helpful option in Excel that locks specific rows and columns making them sticky in one place so that they remain visible when you are scrolling through other parts of the current worksheet.
  • Spilt (Alt, W, S): Splits the window of the

Macros

Provides you access to the Macros menu where you can create new macros, run an existing macro or manage them efficiently. This command helps you to automate your repetitive tasks, and save time, reduce errors as well.

Conclusion

In summary, the View Tab in Excel gives you control over how your workspace should look alike based on your specific needs to enhance productivity like switching different types of the way you want your worksheet to be displayed, adjusting the zoom level, split screen and much more.

Share with your friends

Similar Posts

Leave a Reply

Your email address will not be published. Required fields are marked *