Delete Blank Rows in Excel with a Simple Macro (Step-by-Step Guide)
Messy Excel files with random blank rows are frustrating. I’ve faced them too while working with reports from clients or raw exports from tools. Manua...
If you’re anything like me, you want to spend less time repeating tasks and more time thinking, analyzing, and creating. That’s exactly why learning how to record macros in Excel will change everything for you! In this guide, we’ll walk through the process together, step by step, so by the end, you'll be able to automate those boring chores and make Excel work for you.
Let’s start from the top. An Excel macro is sort of like a personal assistant who remembers every click and keystroke you make, then does all of it on command — instantly. We use macros to capture routine processes like formatting, calculations, and repetitive data entry so that we don’t have to redo them ever again.
Imagine having to bold the header row, centre the text, and change the background color for ten spreadsheets every month. That used to take me ages — until I discovered the magic of recording macros.
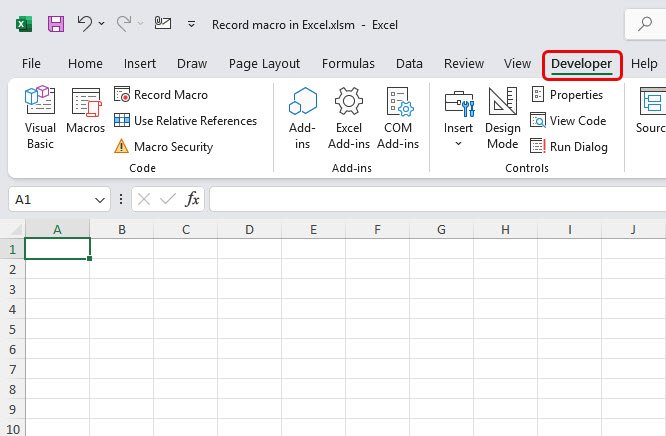
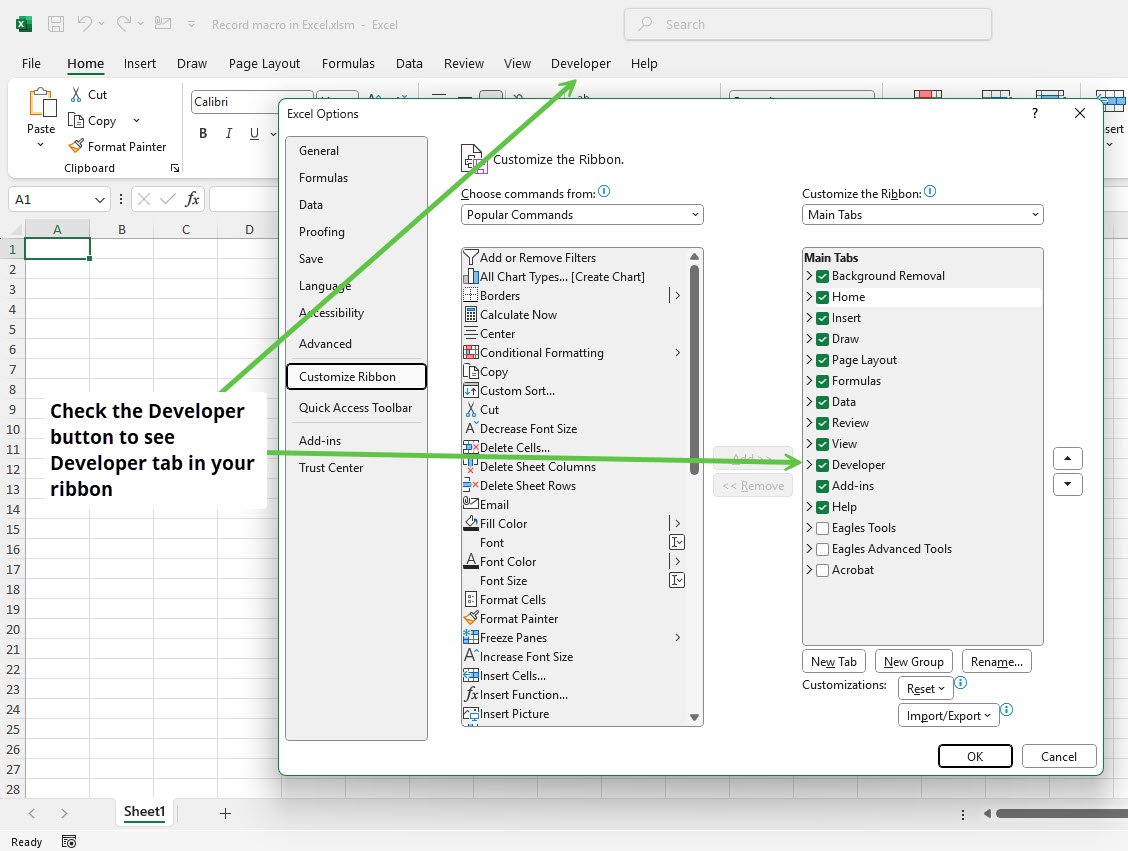
Before we rush in, I want you to make sure you can see the Developer tab at the top of your Excel screen, because that’s where all the macro action happens.
Now we’re ready to record some magic! Here's how we do it — and trust me, it really is simple once you try it.
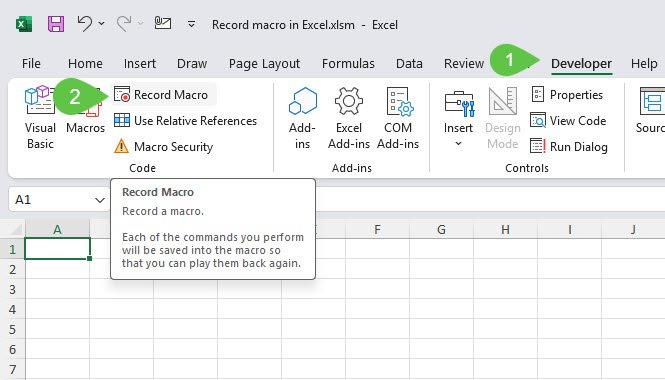
1. Click “Record Macro”
You’ll find this button in the Developer tab, usually in the Code section near the top left. You can also find it under “View” if you’re more comfortable there.
2. Set Up the Macro Details
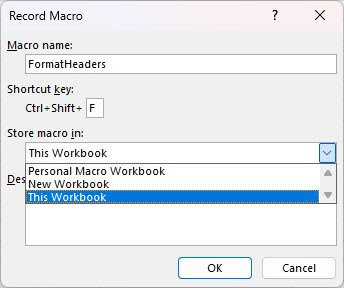
A dialog box appears where you can personalize your macro as per your convenience.
3. Record Your Actions
Let’s do a real example by formatting the top row, which is the header in this. Go ahead and do the steps Excel should remember:
Everything you do right now is being recorded. Don’t worry about perfection — you can always try again. Mistakes help us learn!
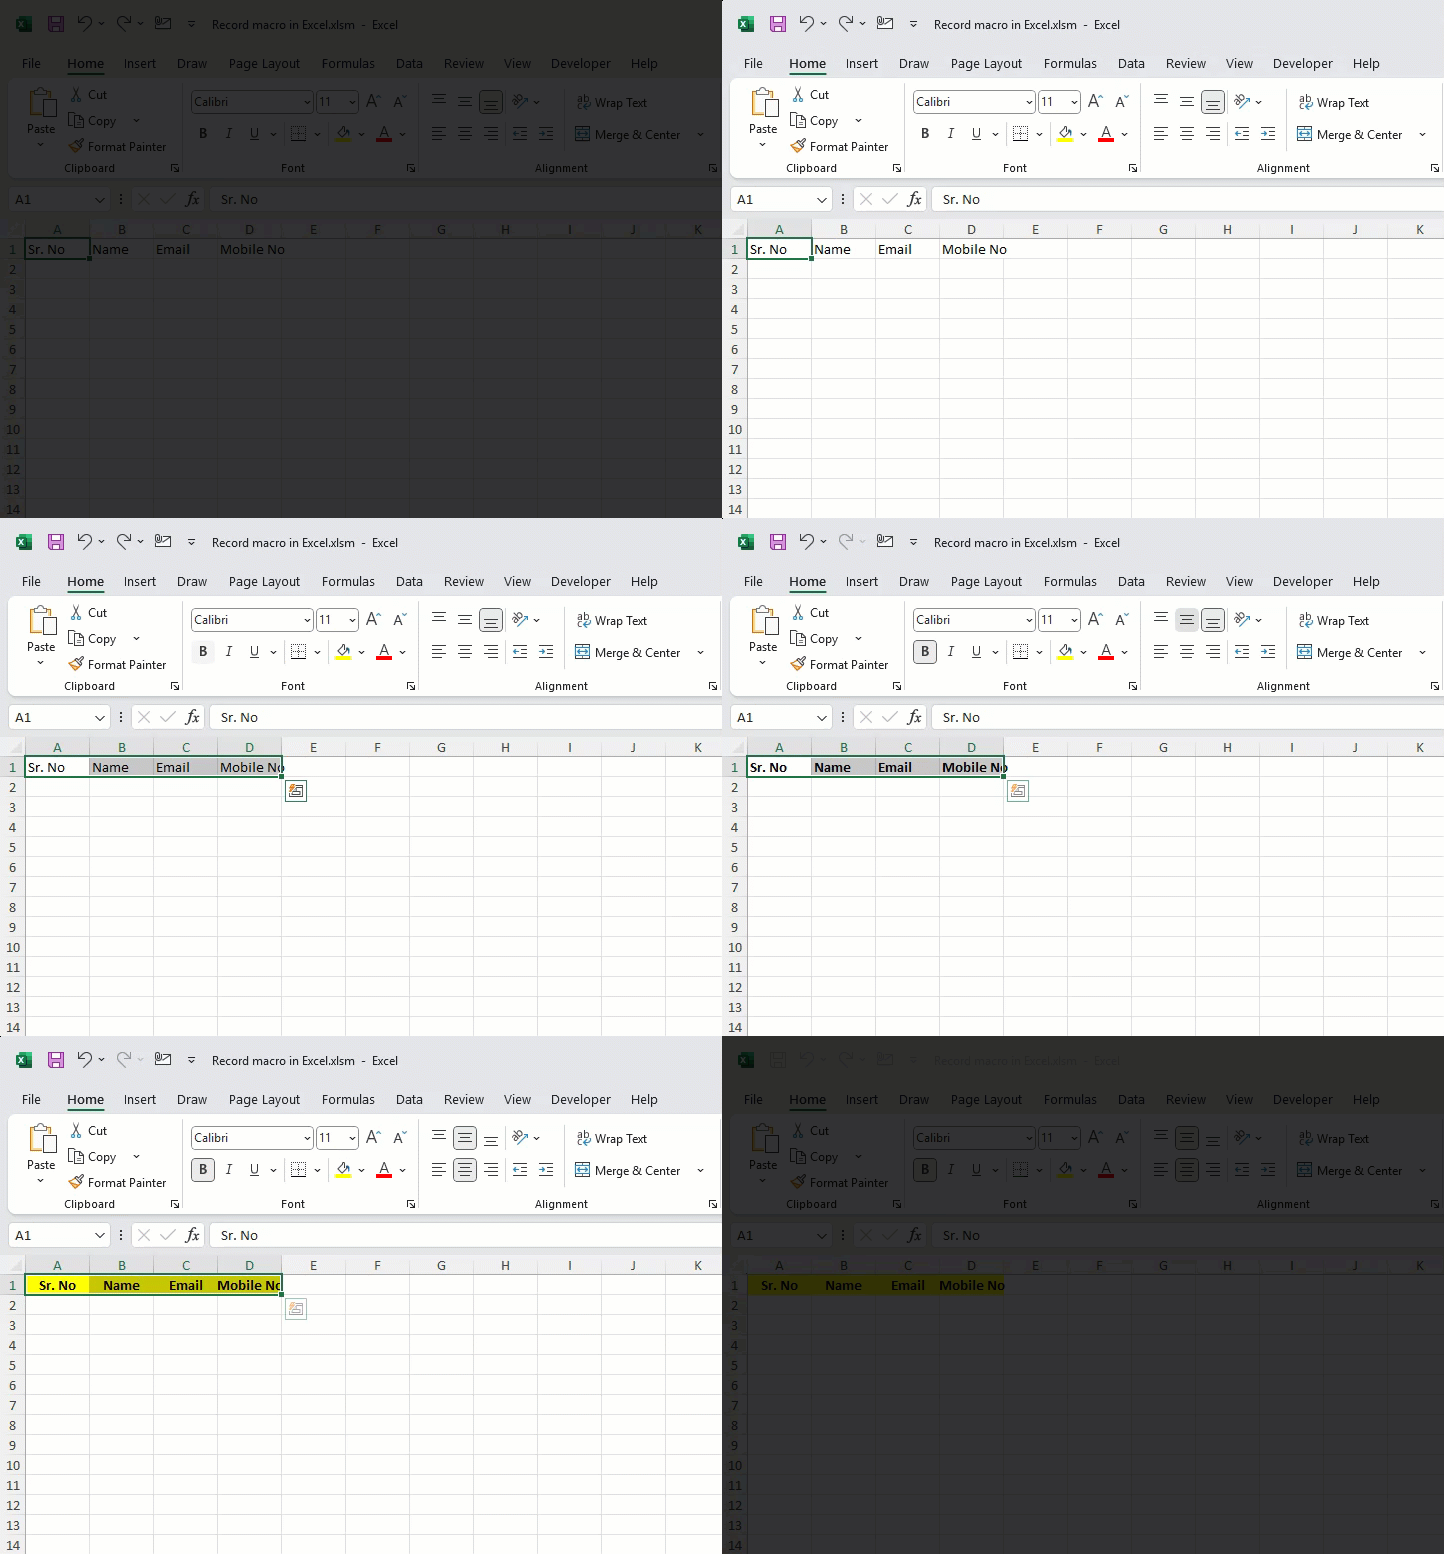
4. Stop Recording
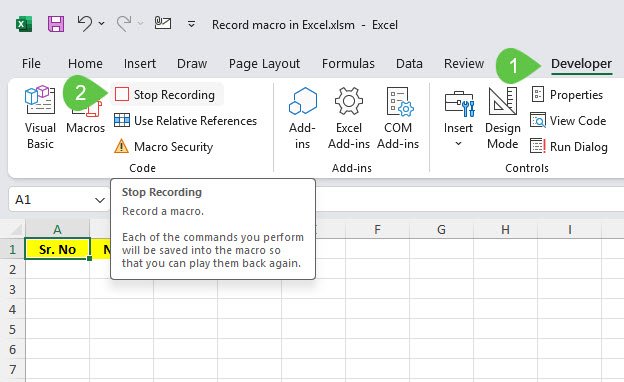
Once you finish all the actions, head back to the Developer tab and click “Stop Recording.” There’s also a small square icon at the bottom left of your Excel window (kind of like a tape recorder’s stop button) — give that a click. And that’s it!
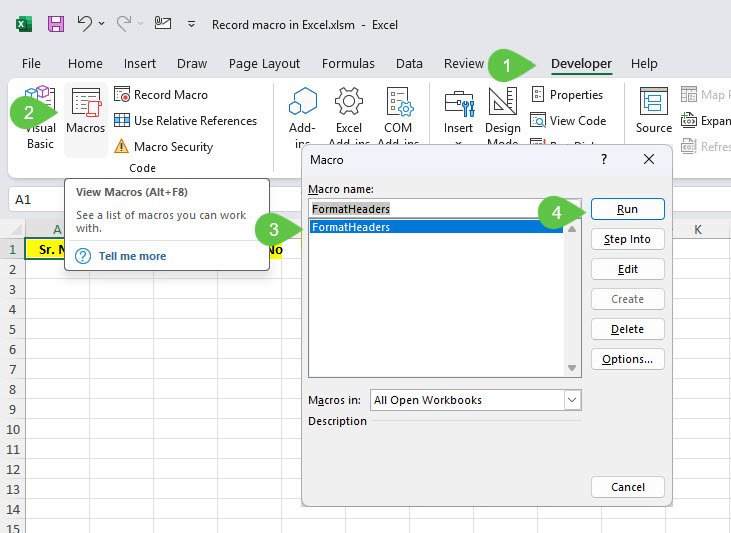
Okay, we’ve recorded the macro — but how do we use it? Here’s how we put it to work:
Suddenly, you’ll see Excel work its formatting magic. If anything looks off, don’t worry — just re-record the macro or edit it later. Nobody gets it perfect on the first go, not even me.
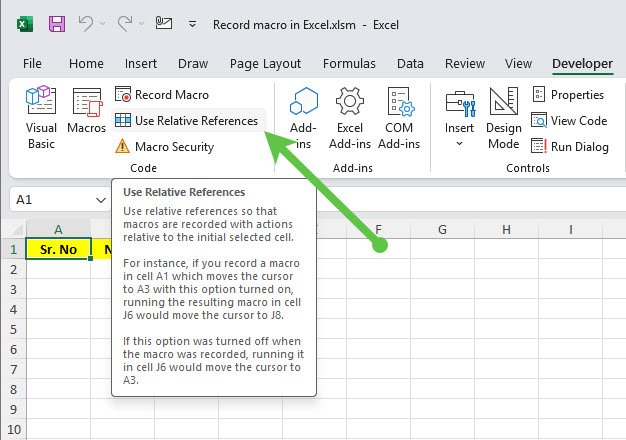
Here’s a secret pros use: Before you start recording, click “Use Relative References” in the Developer tab. This makes your macro apply changes to wherever you have your cursor, not a fixed cell. That means you can reuse your macro across different sheets and ranges, and it’ll always work the way you want.
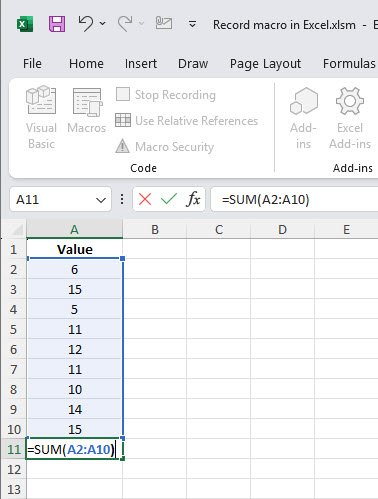
Let’s say you want to automate creating sums for columns of numbers. Repeat the macro recording process:
Now, every time you run your macro at the end of a list, Excel calculates the sum for you — no fuss, no formulas, no stress.
Macros live in whichever workbook you chose (or your Personal Macro Workbook if you set it that way). If you’re curious, you can view and tweak the code:
We have already covered how to see saved macros in "Testing and Using Your Macro".
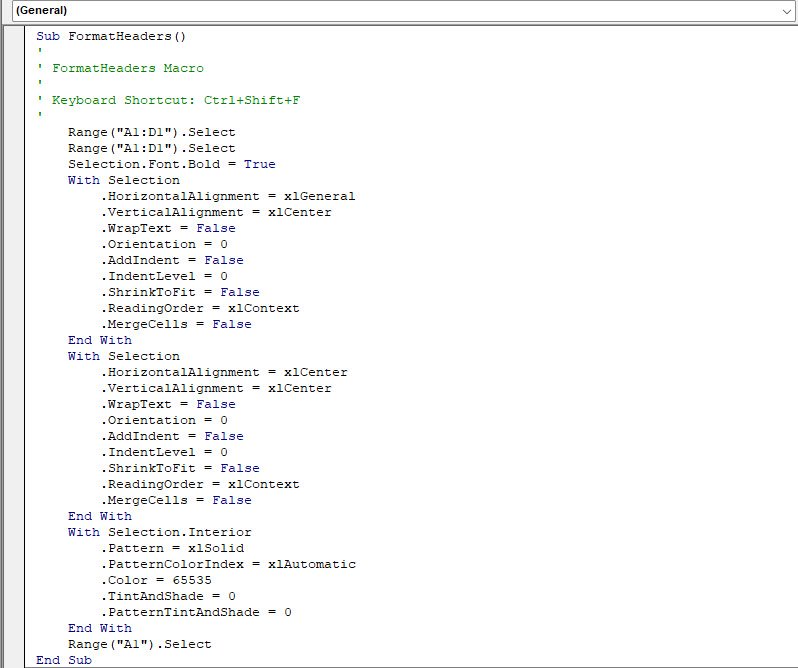
Sometimes macros don’t work perfectly. Let’s talk about what might go wrong and how we fix it together:
I’ve learned a few tricks along the way:
You and I just went from curious beginners to confident macro recorders in Excel! Now we don’t have to waste time on the same old formatting and calculations — with a simple click or keyboard combo, Excel does it for us. Try creating a macro for whatever bugged you most this week and you’ll see why I never work in Excel without macros anymore.
Let’s make Excel work for us, not the other way around. If you have a favorite macro or if you run into a tricky step, leave a comment below — I always love hearing how you solve problems and sharing what works in real life!
No comments yet. Be the first to comment!
Free offline Android app to learn Excel formulas, functions & shortcuts anytime, anywhere!
Download Free AppUse Ctrl+Shift+$ to format numbers as currency instantly.