Delete Blank Rows in Excel with a Simple Macro (Step-by-Step Guide)
Messy Excel files with random blank rows are frustrating. I’ve faced them too while working with reports from clients or raw exports from tools. Manua...
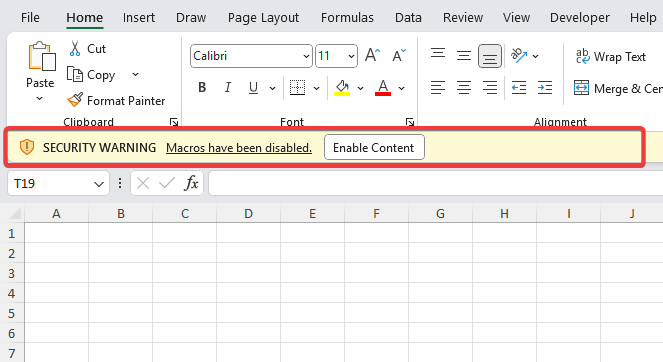
Macros in Excel can save you hours by automating repetitive tasks—but they can also be risky if used carelessly. In this guide, I’ll show you step-by-step how to enable and disable macros safely, plus the best practices you should follow.
If you’ve ever opened an Excel workbook and seen a warning that says “Macros have been disabled”, you probably paused for a moment. Should you enable macros? Should you leave them off? Is there a risk?
Don’t worry, you’re not alone—I’ve been there too. In this guide, I’ll walk you step by step through how to enable macros in Excel, how to disable macros in Excel, what macro settings really mean, and some safety tips that will help you use them without fear.
By the time you finish this guide, you’ll feel comfortable using macros and ready to automate your boring Excel work.
Macros are basically small programs or instructions inside Excel that automate repetitive tasks.
For example:
Technically, macros are written in VBA (Visual Basic for Applications), but the good news is—even if you don’t write code, you can still record and run macros using Excel’s built-in recorder.
But here’s the catch: because macros can run code, they also come with a security concern. Because macros can execute behind-the-scenes commands, a poorly designed or malicious one could put your data at risk. That’s why Excel macro security settings block them by default until you decide whether to trust the file.
You might wonder—if macros are so useful, why won’t Excel just keep them enabled?
The answer is security. A malicious macro can:
To prevent this, Excel shows you a warning whenever you open a file containing macros. Thankfully, Excel leaves the final decision to you—you’re always in charge of when to allow macros. You can enable macros in Excel for trusted files and disable macros in Excel for unknown or risky ones.
Here comes the practical part. There are three main ways to enable macros in Excel depending on your workflow.
This is the most common scenario.
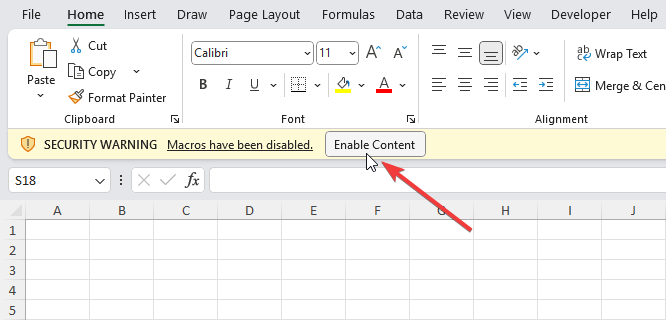
When you open a macro-enabled Excel file (usually with extension .xlsm or .xlsb), you’ll see a yellow bar below the ribbon that says: “Security Warning: Macros have been disabled.”
To enable macros in Excel for that file:
✔️ Use case: This method is perfect if you only occasionally work with macro files and want control each time.
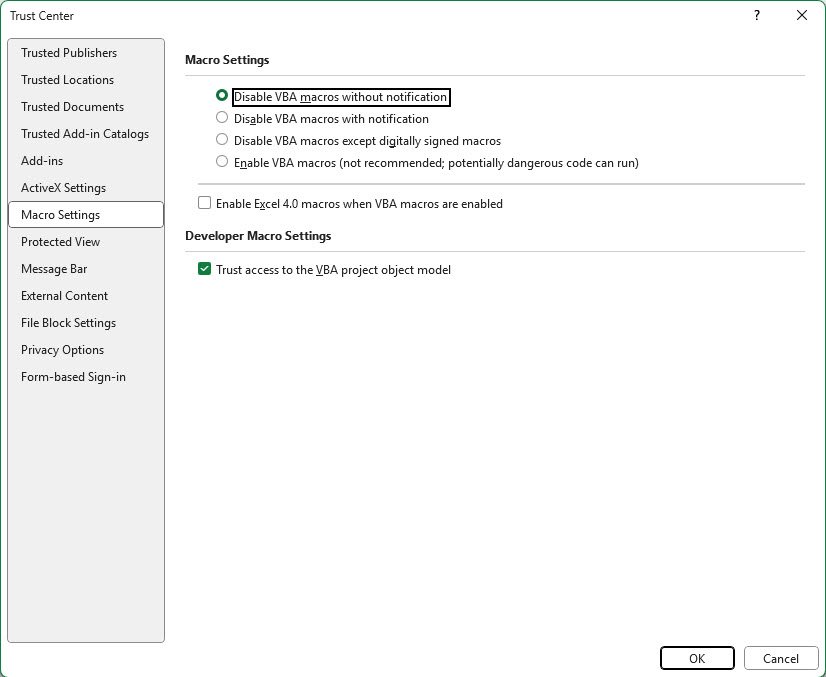
If you regularly use macros and don’t want to press “Enable Content” every single time, you can adjust the macro settings in Excel through the Trust Center.
Steps:
Here you’ll see four options:

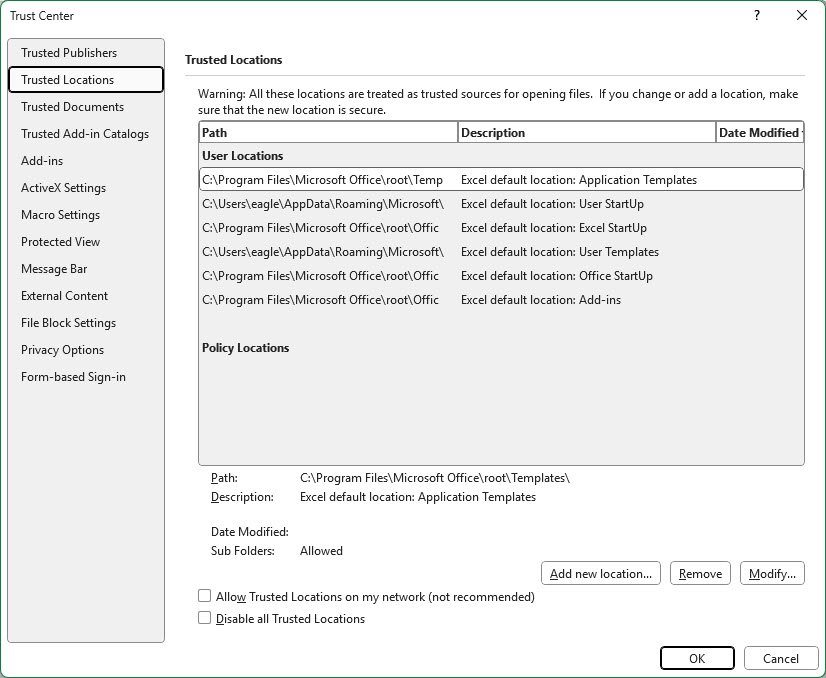
If you have specific folders where all your safe macro files are stored (like templates, automation sheets, or reports), you don’t need to enable macros every time.
You can mark that folder as a Trusted Location.
Steps:
From this point on, Excel will automatically allow macros to run in any file that you save inside that folder.
Now let’s say you earlier enabled macros, but later thought, “Maybe I shouldn’t trust this file.” Or maybe you just want to turn them off completely.
Here’s how you disable macros in Excel:
Now macros in all Excel files are disabled until you change the setting again.
If you just want to stop macros in a single file, simply close Excel and reopen the file but do not click “Enable Content.”
If you’re using Excel through Microsoft 365, the steps are essentially the same. The only difference is that Microsoft 365 sometimes blocks macros even more aggressively if the file comes from the internet (like from an email attachment or a download).
To enable macros in Excel 365 for these files:
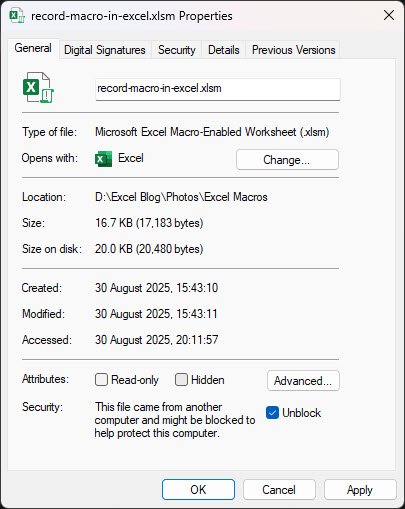
Before enabling the macros easily everywhere, keep these tips in mind:
Let me give you a practical scenario.
At my work, I have a monthly sales tracker with macros that clean raw data and create neat reports. Since I built those macros myself, I added my “Reports” folder as a Trusted Location. Now, every time I open the file, macros run instantly and save me 30 minutes of work each month.
But last month, I received a random Excel file from a supplier that insisted I should enable macros. I didn’t know what was inside, so I left it disabled. That’s the simple rule I follow, and it has kept me safe for years.
Macros in Excel are amazing—they turn boring tasks into one-click magic. But with great power comes responsibility. That’s why Microsoft disables them by default.
Now, you’ve learned:
So next time you see that security warning, you’ll know exactly what to do. Enable if you trust it, disable if you don’t—and enjoy making Excel work harder for you.
No comments yet. Be the first to comment!
Free offline Android app to learn Excel formulas, functions & shortcuts anytime, anywhere!
Download Free AppUse F2 to edit a cell without double-clicking on it.