Delete Blank Rows in Excel with a Simple Macro (Step-by-Step Guide)
Messy Excel files with random blank rows are frustrating. I’ve faced them too while working with reports from clients or raw exports from tools. Manua...
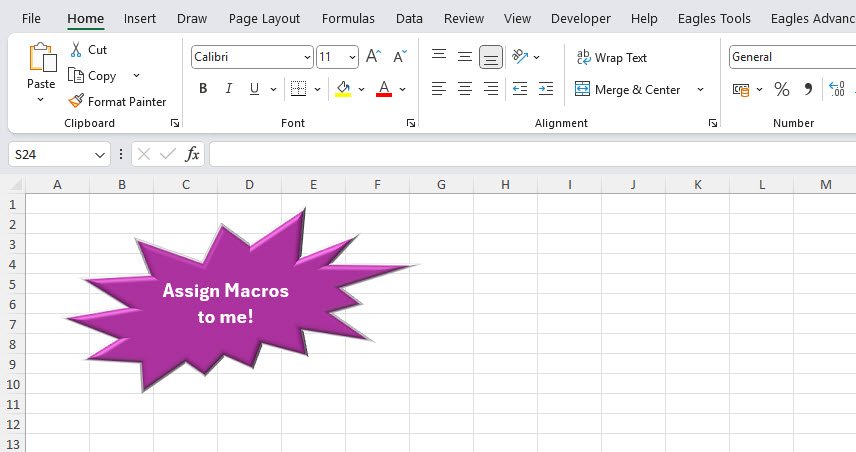
Have you ever wished you could make your Excel workbooks more interactive and user-friendly? What if you could click a button, shape, or even an image and instantly run your favorite macro? Actually, it is much simpler. Today, I’m going to show you, step by step, how to assign macros to shapes, images, and controls inside Excel so you can impress yourself and others with your automation superpowers.
Let’s dive in and transform your Excel sheets from plain spreadsheets to powerful interactive tools that anyone can use—even those who don’t know a thing about macros!
First, a little context: macros automate repetitive tasks. Normally, to run a macro, you open the Developer tab and click the macro’s name, which can be a bit clunky. Assigning macros to shapes or images turns your workbook into a visual dashboard.
Imagine this: instead of a boring list of macros, you have colorful buttons, icons, or even pictures, and clicking any of these triggers a macro instantly. It’s a game-changer for ease of use and presentation.
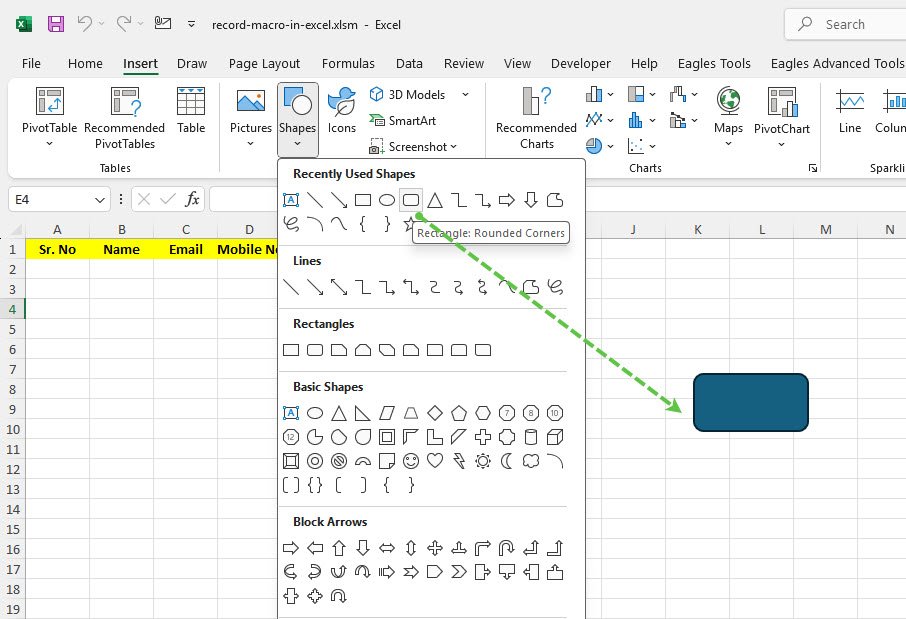
Draw by clicking and dragging the selected shape on your worksheet. Feel free to customize it later with colors or text.
Pro tip: Add a label directly on the shape with text like “Run Report” or “Format Table” so everyone knows what it does.
Here’s the magic part:
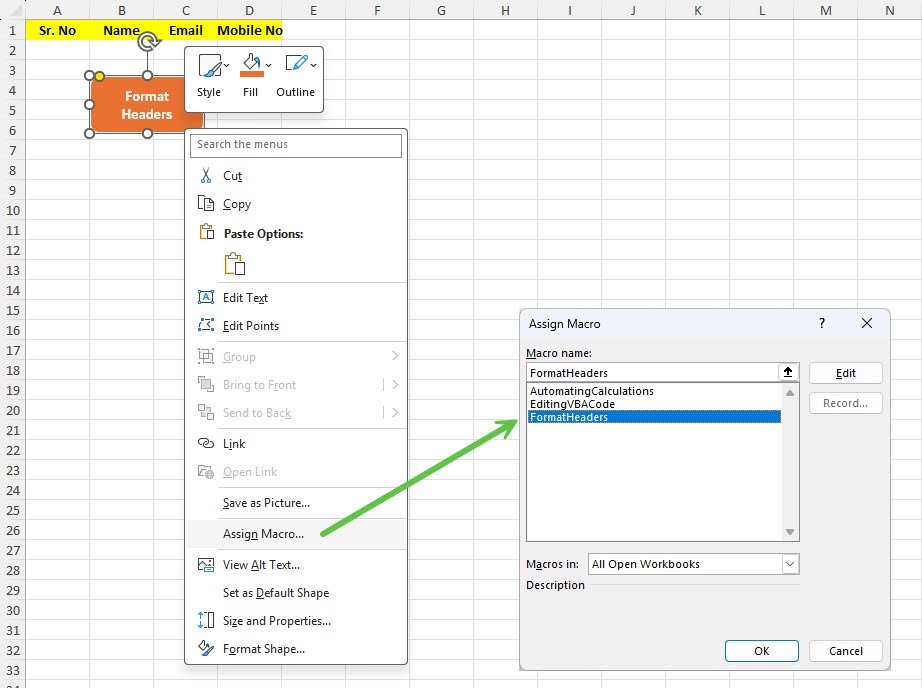
Moving forward, whenever you click on the shape, the macro runs!
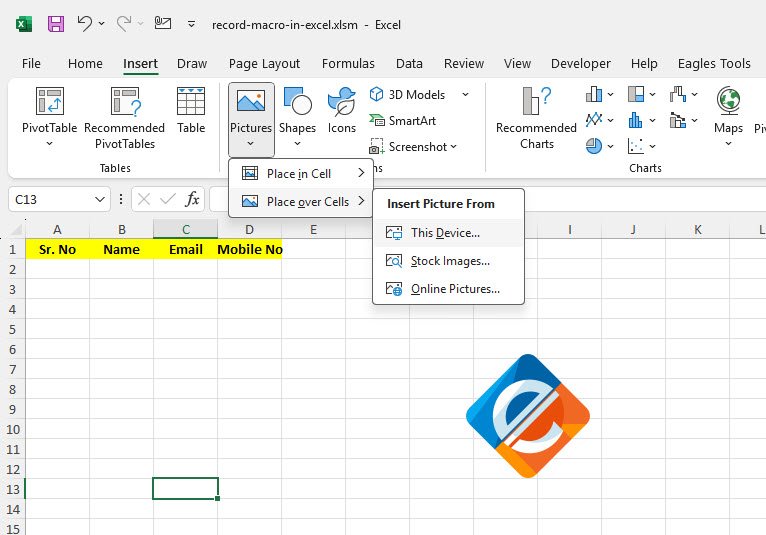
Same as we did for shapes, just right-click on the image and select Assign Macro.
Think of creative images : a little printer icon to run a print macro or a checkmark for validation macros—it makes your workbook feel like an app!
Excel also has a set of Form Controls that you can add for user-friendly macro triggers:
If you haven’t done this yet:
If you want to know the full steps on how to show the developer tab, read here.
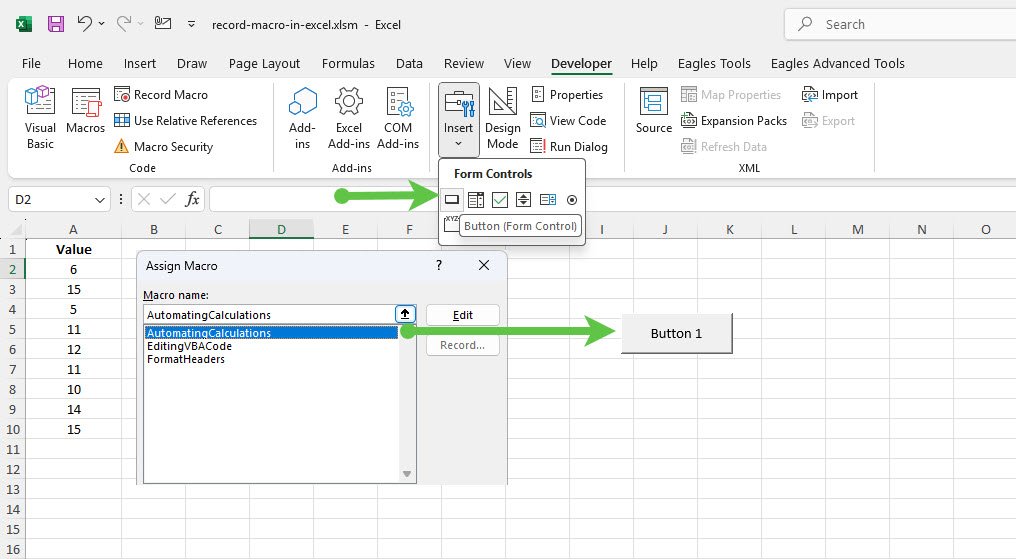
Now you have a clickable button that runs your macro on demand.
You can change the button’s text by right-clicking it and selecting Edit Text. These buttons can be resized, repositioned, and copied anywhere in your workbook.
Pro tip: Use buttons for complex workbooks shared across teams to make macros accessible without requiring users to know VBA.
For more advanced users, ActiveX controls offer extra customization:
Follow the same steps as we did add in normal Form Controls in previous method
Example:
Private Sub CommandButton1_Click()
    Call YourMacroName
End SubActiveX controls can be trickier and less stable on some Excel versions, so test carefully.
Assigning macros to shapes, images, and controls in Excel is a fantastic way to make your workbooks interactive and beginner-friendly. It turns repetitive tasks into one-click wonders and helps you build professional-quality spreadsheets that feel like custom applications.
So next time you build a macro, why not give it a colorful button or an icon? You’ll love how much easier it makes your work, and anyone who uses your workbook will thank you for it.
If you have questions or want a recipe for a specific macro-button combo, just give me a shout—let’s keep making Excel a tool we love working with!
No comments yet. Be the first to comment!
Free offline Android app to learn Excel formulas, functions & shortcuts anytime, anywhere!
Download Free AppPress F4 to repeat your last action - great for formatting multiple cells.