Delete Blank Rows in Excel with a Simple Macro (Step-by-Step Guide)
Messy Excel files with random blank rows are frustrating. I’ve faced them too while working with reports from clients or raw exports from tools. Manua...

If you’ve started exploring macros, you already know how to record them to automate repetitive tasks. But here’s a little secret: knowing how to edit VBA code takes your Excel skills from good to truly powerful. Editing your VBA (Visual Basic for Applications) code means you can customize your macros exactly how you want, fix little issues, and even create new functionalities.
I’m excited to walk you through this journey step-by-step, reassuring you that you don’t need to be a coder or programmer to get a grip on VBA. We’ll explore the essentials of editing your macro code with simple explanations and examples—like having a friendly chat about Excel’s hidden engine.
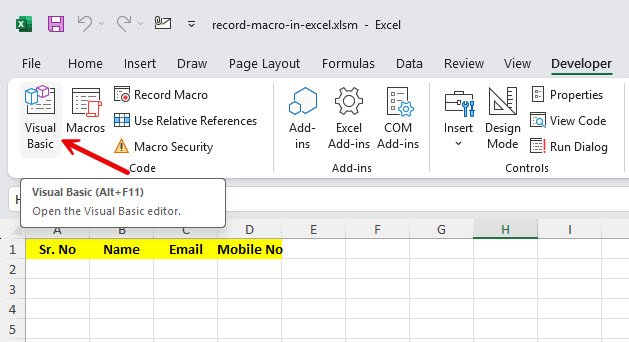
Let us begin by opening the VBA editor, a place where all our magic happens in Excel.
This opens the VBA Editor in a new window—don’t worry, it’s not intimidating after a bit of exploration.

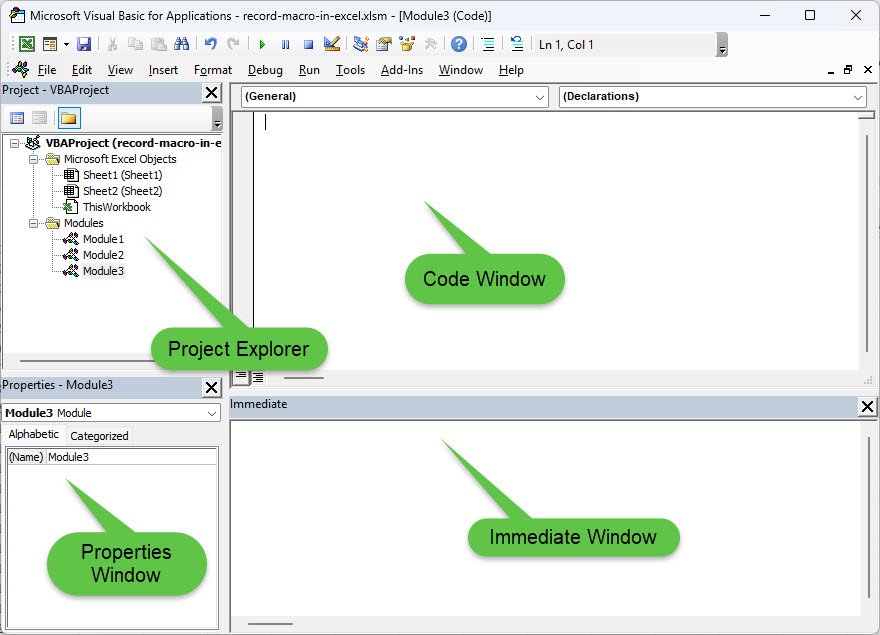
When the VBA Editor opens, you’ll see a few key panels:
Spend some time clicking around, but here’s the golden rule—always save your work before making changes. It’s better to be safe than sorry!

Macros that you record typically store their code in Modules. To open yours:
The macro will be like below, but don’t panic we are here to learn:
Sub FormatHeaders()
    Range("A1:D1").Select
    With Selection.Font
        .Bold = True
    End With
    Selection.HorizontalAlignment = xlCenter
    Selection.Interior.ColorIndex = 15
End SubHere’s where the fun starts! Let’s alter a few things to understand how editing the code impacts the macro.
Instead of formatting A1:D1, what if you want to format A1:F1? Just change:
Range("A1:D1").Selectto
Range("A1:F1").SelectSave the change by hitting Ctrl + S or clicking the Save icon.
Maybe you want the headers to be in italic instead of bold. Change:
.Bold = Trueto
.Italic = TrueRun your macro again in Excel, and see the difference right away!
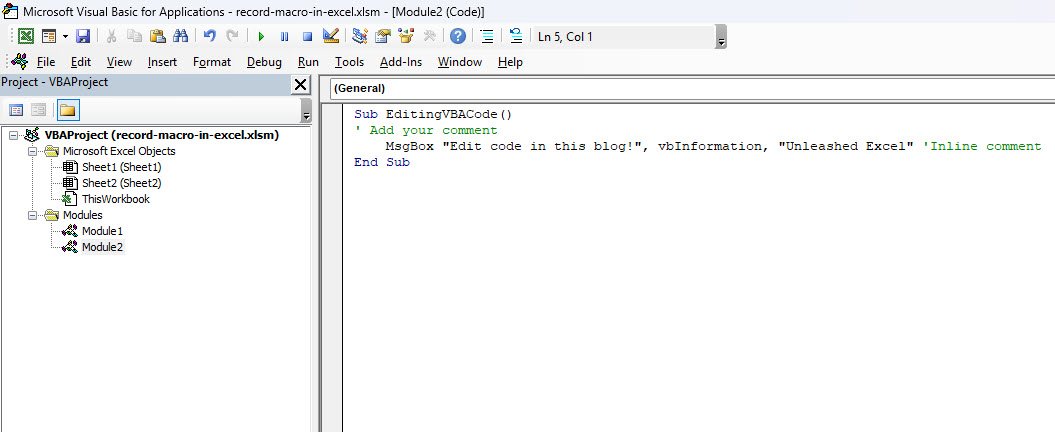
Comments are lines that start with an apostrophe ('). They don’t run—they’re just notes you or others can read later. I always add comments to my macros to keep track of what each part does.
For example:
' This formats the first row which is header with italic font and background color
Range("A1:F1").Select
With Selection.Font
    .Italic = True
End With
Selection.HorizontalAlignment = xlCenter
Selection.Interior.ColorIndex = 15Let’s say your macro formats headers, but sometimes your header row is on row 3 instead of 1. Instead of changing the code every time, let’s introduce a simple variable:
Sub FormatHeaders()
    Dim headerRow As Integer
    headerRow = 3
    Range("A" & headerRow & ":F" & headerRow).Select
    With Selection.Font
        .Italic = True
    End With
    Selection.HorizontalAlignment = xlCenter
    Selection.Interior.ColorIndex = 15
End Sub
Now, if you want to format a different row, just change the value of headerRow at the top without touching the rest.
Remember, you can always close the VBA Editor without saving changes if something goes wrong. Just reopen it later and start fresh.
Also, when saving your Excel file, use the .xlsm extension (Excel Macro-Enabled Workbook) so your code is saved alongside your workbook.
Keep your VBA project organized by:
This way, your VBA projects won’t turn into an unmanageable mess.
VBA is a language, but it’s one you can learn little by little, one step at a time. I still get stuck sometimes but having fun with it makes all the difference.
Editing VBA code may look intimidating, but as you’ve seen, it’s really just tweaking text that tells Excel what to do. Once you get the hang of basic edits and testing, you’ll unlock creative ways to automate, customize, and wow yourself with Excel power.
I encourage you to open the VBA Editor in your own Excel workbook today, find a macro you’ve recorded (or create one), and start playing with the code. Don’t stress about getting everything right—it’s all part of the learning adventure.
And hey, if you want to share your macro creations or stuck somewhere, leave a message—I’m always happy to help out because we’re all learning together!
No comments yet. Be the first to comment!
Free offline Android app to learn Excel formulas, functions & shortcuts anytime, anywhere!
Download Free AppUse Ctrl+; to insert today's date in any cell quickly.