Many find adding rows in Excel is a simple task, but do you know there are several efficient ways to Insert Rows in Excel? You might be inserting a single row, or multiple rows or even want to add rows in a table. Excel gives us a lot of options to insert rows in your spreadsheet that keep your data organized.
Let’s walk around various methods for inserting rows in Excel – both manual and automated as well which will make your work easier. We will also look at how to troubleshoot some of the common issues and how to insert rows using VBA which is an advanced technique.
How To Guide
How To Guide
Pro Tip:
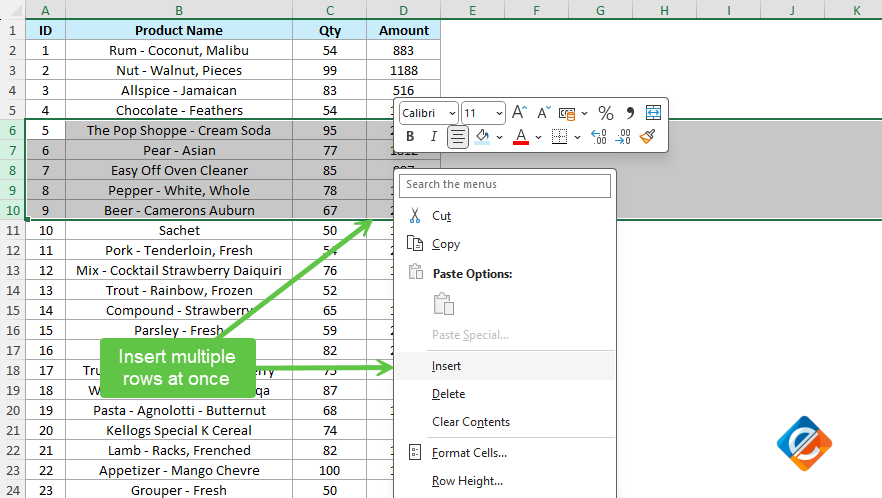
Inserting Multiple Rows If you want to insert multiple rows at once, simply select the same number of rows you want to insert. For example, if you want to insert 5 rows, select 5 existing rows and then use the shortcut. Excel will insert the same number of rows selected.
How To Guide
Pro Tip:
Adding Multiple Rows Just like how we saw adding multiple rows with shortcuts, you can follow the same method by selecting multiple rows going to Cells group under the Home menu and clicking on Insert option to add those rows.
How To Guide
Why Use Tables in Excel?
Tables offer many advantages in Excel including automatic formatting, filtering, and dynamic ranges when working with complex calculations. When a new row is added to a table, Excel will make sure the formatting is applied to the new row and a formula is also inserted automatically which will generally save you time by manually adjusting each row.
Inserting Rows Based on Conditions
Sometimes you will come across a situation where you want to insert rows automatically based on certain conditions. For example, you may have a dataset where a column contains certain criteria, and you want to insert a new row whenever those criteria are met. In such cases, you can use a helper column with formulas to achieve this in an organized and efficient manner.
Example: Adding Rows When a Value matches
Let’s say you want to insert a new row every time the value in column A is “Yes.” Here’s how you can do it:
Step 1: Create a helper column (for example in column B) and enter this formula: =IF(A2=”Yes”,1,0) This formula will return as 1 where the value in column A is “Yes”.
Step 2: Sort your data by the helper column to group all the rows that meet the condition. In this example, the helper column reflects as 1.
Step 3: After sorting the data, you can use either manual insertion of rows or VBA code to automate the process. VBA is generally recommended when working with larger datasets to save time and errors as well.
Using VBA to Automate the Insertion of Row
For a repetitive or complex task, Excel’s VBA is a powerful tool. You can easily insert the rows with the help of VBA, mainly if you are working with a large dataset or a structured task.
Example: Insert a Row after Every 10 Rows in your active sheet.
Below is a simple VBA script to insert a row after every 10 rows:
Vba
Sub InsertRowsEvery10()
    ' Declare a variable to hold the last used row number in the sheet
    Dim lastRow As Long

    ' Get the last non-empty row in column A and assign it to lastRow
    lastRow = Cells(Rows.Count, 1).End(xlUp).Row

    ' Loop through the sheet, moving 10 rows at a time, starting from row 10
    For i = 10 To lastRow Step 10
        ' Insert a new row directly beneath every 10th row
        Rows(i + 1).Insert Shift:=xlDown
    Next i
End Sub
The above script loops through each row and inserts a new row after every 10th row. If you regularly need to insert rows, using VBA will save you lots of manual effort.
When to Use VBA?
If your dataset is very large, using VBA is a perfect method. Once you write a code, you can use it again and again in your entire workbook without manually inserting rows every time.
Troubleshooting Common Issues when Inserting new Rows
While inserting new rows, you might sometimes run into issues. Below are some of troubleshooting tips:
Hidden Rows: Sometimes, hidden rows can confuse. If you are trying to insert a row and nothing is happening, make sure there are no hidden rows that might affect your operations.
Circular References: Be careful when working with formulas that have references to other cells. Inserting new rows could create circular references and may lead to calculation errors.
Relative References: If you copy and paste the formulas when inserting the rows, Excel will adjust the references automatically. Make sure you are using the relative references so that cell references update correctly after inserting the new rows.
Formatting New Rows
Whenever the new rows are inserted, Excel does a pretty good job by copying the existing formatting. But if you want more control over how new rows are formatted, below are a few things to keep in mind:
Conditional Formatting: If you have conditional formatting in place, new rows will inherit the existing rules automatically.
Custom Formats: To maintain consistency, you can format the newly added rows by just simply selecting them and applying the custom styles or formats using the Home tab.
Note:
When working with a larger dataset, consider using the freeze panes to keep your header or important rows visible when scrolling. To read more about how to Freeze Panes in Excel, click here.
Conclusion
Inserting the new rows in Excel can be achieved in many ways depending on your needs. From simple right-click commands, keyboard shortcuts or even using VBA to automate your tasks, knowing these techniques will make working with Excel more easy and increase productivity.
The key is to choose the method that exactly fits your workflow and to also be aware of the potential issues like formula updates and formatting.
Ever wished you could analyze data in Excel at the speed of light? With these 25 essential shortcuts, you'll work smarter, not harder. Let me show you...
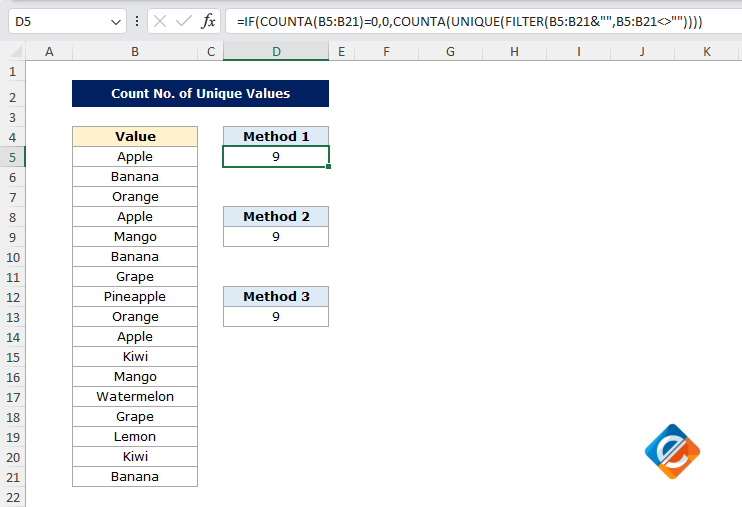
As you know, Excel is a powerful tool, but sometimes it can be confusing, especially when we need to perform a specific task such as counting the uniq...