
The Data Validation in Eagles Tools simplifies the way to apply data validation rules to your cells in Excel. These features help you maintain your data clean, consistent, and error-free which will save you time and also reduce the risk of mistakes.
Features in the Data Validation
1. Data Validation Menu
This menu includes a comprehensive set of tools to apply data validation rules for the selected cells in your worksheet.
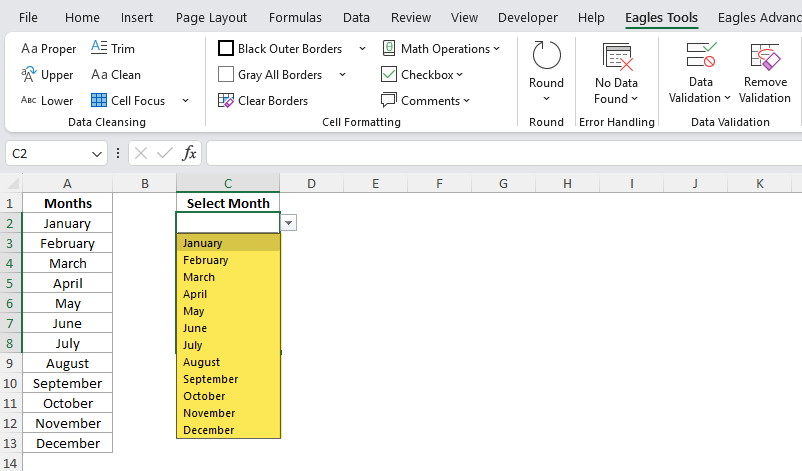
Insert Dropdown with User Selection
Prompts to select values that will populate a dropdown list for the selected cells.
How to Use:
- Select the cells.
- Click Insert Dropdown with User Selection in the Data Validation Menu.
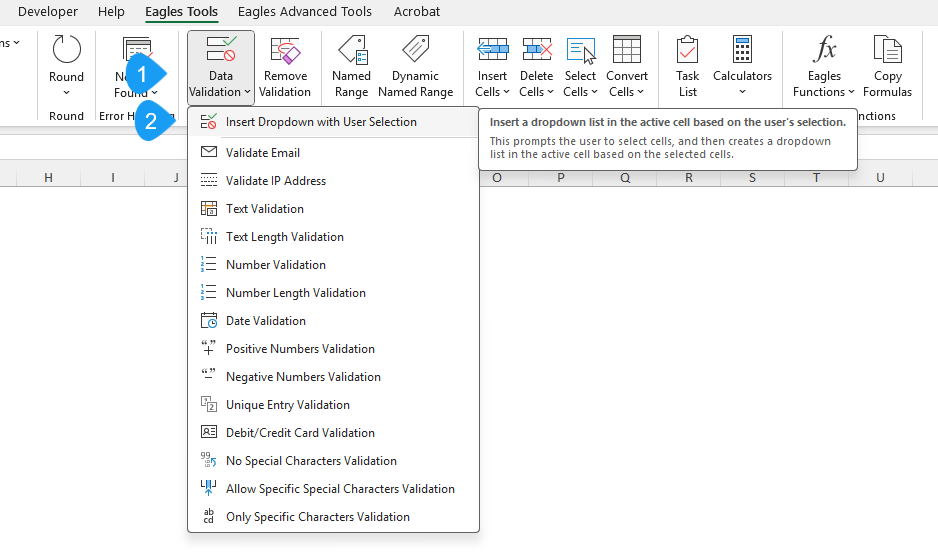
- A popup will appear asking you to select the values for the dropdown.
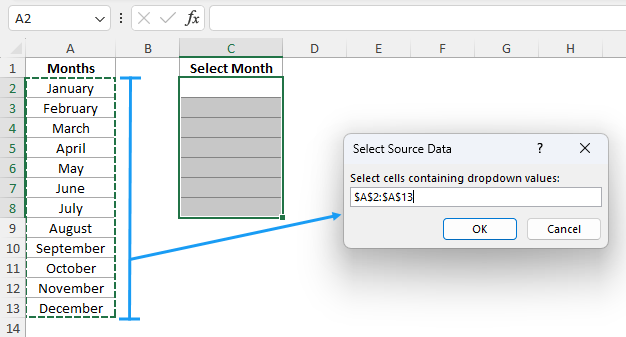
- Confirm, and the dropdown list will be added to the selected cells.
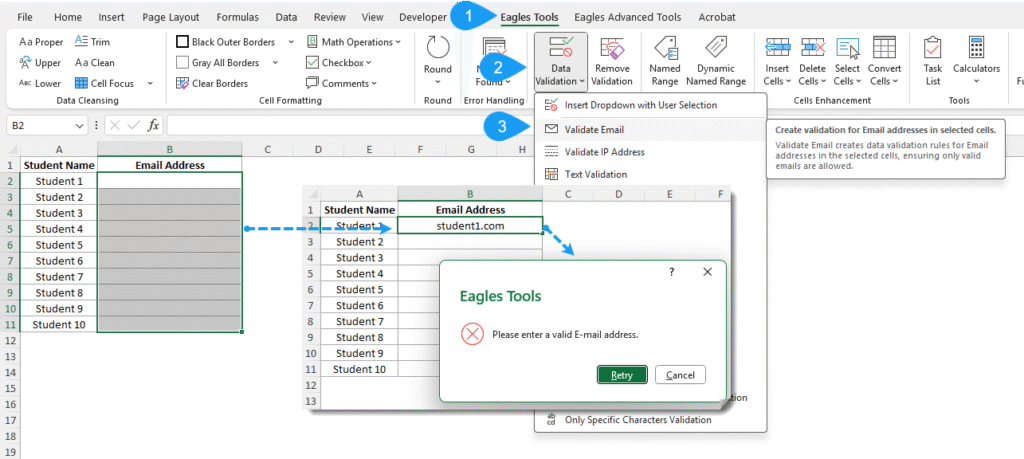
Validate Email
Adds a data validation rule to ensure only valid email addresses can be entered.
How to Use:
- Select the cells.
- Click Validate Email.
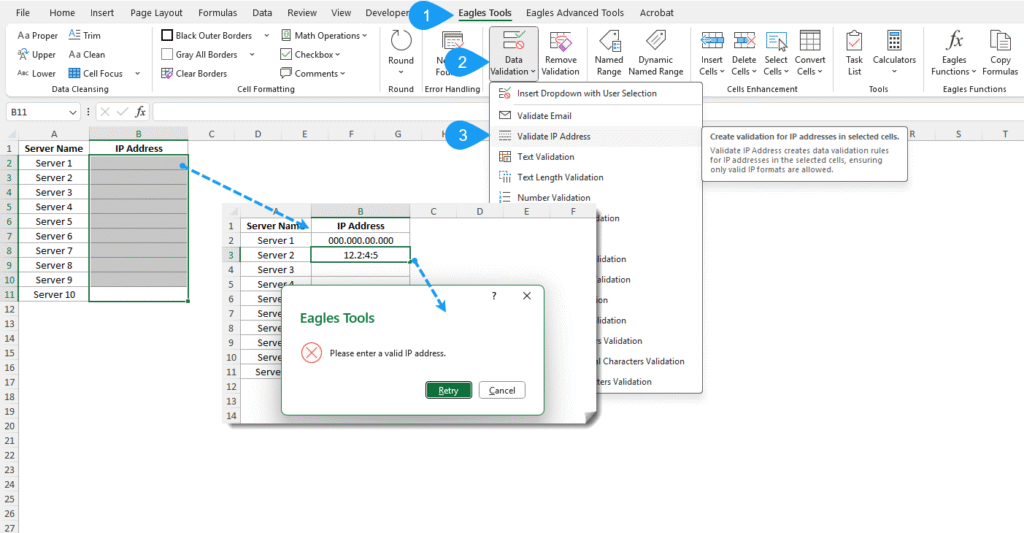
Validate IP Address
Ensures only valid IP addresses can be entered in the selected cells.
How to Use:
- Select the cells.
- Click Validate IP Address.
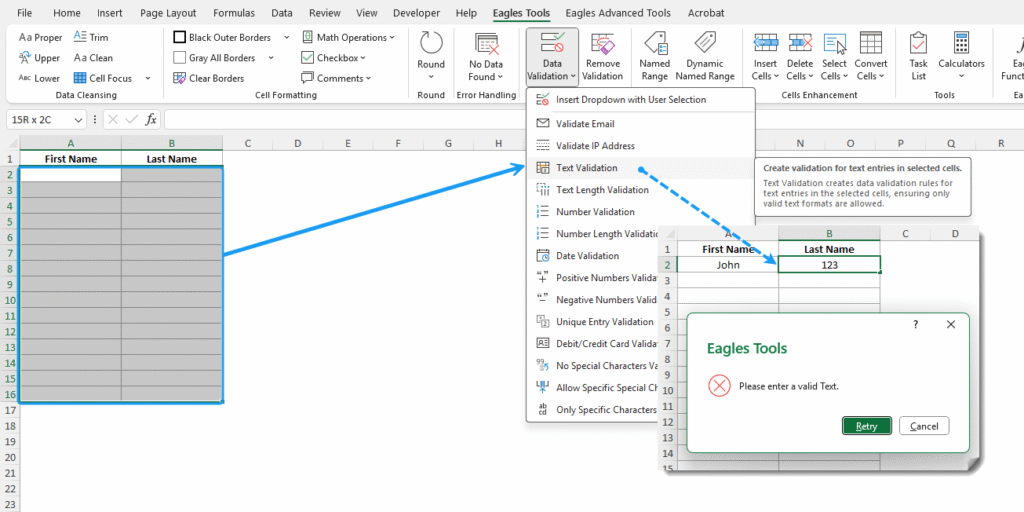
Text Validation
Ensures only text values can be entered in the selected cells.
How to Use:
- Select the cells.
- Click Text Validation.
Text Length Validation
Ensures only the specified length of the text is entered in the selected cells.
How to Use:
- Select the cells.
- Click Text Length Validation.
- A popup will appear so you can specify the text length to be allowed.
- Confirm, and the rule will be applied.
Number Validation
Restricts to enter only numeric values in the selected cells.
How to Use:
- Select the cells.
- Click Number Validation.
Number Length Validation
Ensures only the specified length of numbers are entered in the selected cells.
How to Use:
- Select the cells.
- Click Number Length Validation.
- A popup appears for you to specify the maximum number length to be allowed.
- Confirm, and the rule will be applied.
Date Validation
Restricts the user to enter text or characters and allows only dates.
How to Use:
- Select the cells.
- Click Date Validation.
Positive Numbers Validation
Allows only positive numeric values in the selected cells.
How to Use:
- Select the cells.
- Click Positive Numbers Validation.
Negative Numbers Validation
Allows only negative numeric values in the selected cells.
How to Use:
- Select the cells.
- Click Negative Numbers Validation.
Unique Entry Validation
Prevents entry of duplicate values in the selected cells.
How to Use:
- Select the range to prevent duplicate entries.
- Click Unique Entry Validation.
Debit/Credit Card Validation
Ensures only debit or credit card format numbers can be entered.
How to Use:
- Select the cells.
- Click Debit/Credit Card Validation.
No Special Characters Validation
Ensures only numbers and text are entered in the selected cells and prevents special characters.
How to Use:
- Select the cells.
- Click No Special Characters Validation.
Allow Specific Special Characters Validation
Allows only certain special characters, as specified by the user.
How to Use:
- Select the cells.
- Click Allow Specific Special Characters Validation.
- A popup will appear where you can enter the specific characters you want to allow.
- Confirm, and the rule will be applied.
Only Specific Characters Validation
Restricts input to only specific characters, as specified by the user.
How to Use:
- Select the cells.
- Click Only Specific Characters Validation.
- A popup will appear where you can enter each allowed character.
- Confirm, and the rule will be applied.
2. Remove Validation
Removes any data validation rules from the selected cells.
How to Use:
- Select the data validation cells.
- Click Remove Validation.
- A confirmation dialog appears to accept if you want to remove the validation.
- Confirm, and the data validation will be cleared.
Handling Existing Data Validation
If any selected cells already have a data validation rule, a confirmation dialog box appears if you want to overwrite the existing data validation. This ensures you don’t unintentionally replace existing rules.
Why use the Data Validation?
- Effortless Configuration: Quickly set up complex validation rules without many writing formulas and applying them.
- Enhanced Data Accuracy: Prevent invalid entries and enforce data consistency.
- Customizable Rules: Tailor validation to specific needs with flexible options for characters, formats, and more.
- Time-Saving: Eliminate manual setup, reducing errors and improving efficiency.